Learning Goal #6
Students will be able to design a collection of original websites with creative section elements managed through an external, cascading style sheet.
PART 1: Deadlines
Read More
Below are your deadlines for Learning Goal #6: Mastering the Box Model with CSS3. If you complete approximately 1.5 lessons per week, you should be able to keep up with the deadlines.
- April 12, 2019:
5 Lessons Complete (6.1 through 6.5) - May 3, 2019:
6 Lessons Complete (6.6 through 6.11) - TO BE DETERMINED (May 2019):
ICT Final Exam (Web Essentials) - May 6, 2019 through May 28, 2019:
LG6 Final Project
REMINDER: In order to earn an A for each lesson, you need to complete each assignment within the lessons. At the end of each lesson, you will take a short quiz on eCampus and confirm that you have done all the assignments. If you only do some of the assignments, you can still do okay, but it is in your best interest to complete them all. Your grade depends on how much you get done within the time you are given.
PART 2: Overview
Read More
Moving elements effectively around a page is one of the hallmarks of a good designer. When you started designing websites in this class, you learned how to embed pre-made backgrounds and connect image files to the body. That’s too easy at this point. Now you should be thinking about how to design an entire webpage or webpages using a variety of elements and positioning them where you want them for the best layout. This lesson will give you a chance to experiment with building a page design with elements, rather than just tossing in a background and walking away.
Below are some helpful tips and resources that you can use during and after this lesson is over.
CSS Style Tips to Remember
- The position property allows a designer to where, exactly, an element should go on the page.
- The float property allows a designer to put block level elements in the same line by “floating” them next to each other if there is room along the x-axis (horizontally).
- The overflow property is helpful for designers who want a box to stay the same height with content that takes up more space than the box allows.
- The z-index property allows a designer to move an element behind another element (for example, if there is an overlap of two boxes and one should be in front of the other). This is called a stack order because elements are being stacked on top of each other.
PART 3: Assignments
Read MoreAssignment #1 (1 Point): SoloLearn Video Lessons
 Log into your SoloLearn account and find the Course called CSS Fundamentals. Inside of this course, watch the following lessons (you will need your headphones), but when you finish, be sure to make note of how many SoloLearn points you have earned. Points are based on how many sections you complete and how many questions you answer correctly after each section.
- Positioning
- Floating
- The clear property
- The overflow property
- The z-index property
- Module 4 Quiz
Assignment #2 (1 Point): Design Project
 Positioning boxes (divs, articles, navs, etc) is one of the most important skills of a web designer. In today’s lesson, you will be creating a three-page Central American flag site with each page representing a new flag. But here’s the catch… while you can use the logos of the flags as the background of a single block (like stars or a PNG of the country’s emblem), you absolutely cannot use a complete picture of the flag as your page. That’s cheating. You must actually figure out how to design the flags by positioning elements throughout the page.
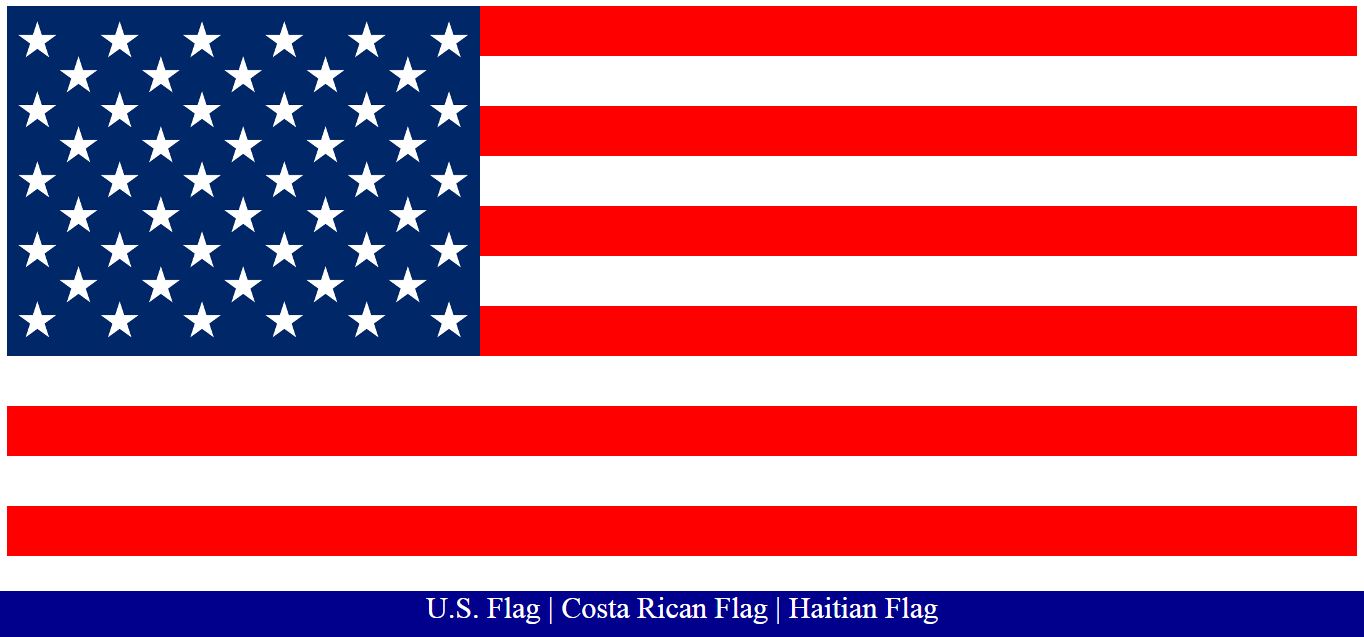
For example, if you were designing a page for the U.S. flag (like the one on the right), you could use a white background, create 5-6 red bars that go across the page (separated by top or bottom margins), then create a blue block at the top left with a covered background of 50 stars. Simple as that. Of course, now that you know how the U.S. Flag was designed with HTML/CSS, you may examine the source code behind the teacher demo, but you may NOT use it as one of your pages. Besides, this is a project for Central American countries and the United States is a NORTH American country.
Click on the U.S. flag image above (a 3-page website), look at the source codes for each page (HTML/CSS), then begin designing your own three-page Central American flag site. Here are the names of the countries you may choose from, but you’ll have to figure out what their flags look like and how to design them on each individual page. In addition to the U.S. Flag, you also may NOT use Costa Rica or Haiti since those flags were already designed in the demo. You may get ideas from the flag site source code, but you must choose three new Central American countries from the list above and the appropriate flags that belong to those nations.
Assignment #3 (1 Point): Update Your Index
Similar to the last lesson, take the time to add your new design to your index page using a screenshot and a link. Remember that since you built a three page website, you do not need to provide a link to all three pages. All you need to provide is a link to the first page, which already links to the other pages. Also, remember that the links will have to point into the folder you made.
Assignment #4 (1 Point): eCampus Checkin
You no longer have any review sheets or review quizzes other than the final ICT Exam at the end of the semester. But if you have gotten this far, you still need to check in on eCampus and complete the quiz question that asks whether you finished all the assignments in this lesson. Once you’ve done that, you’re all set for the next lesson.
If you have finished the assignments in this lesson, you will need a new password so that you can enter Lesson 6.8. Feel free to ask the teacher and don’t be afraid to raise your hand or go up to ask. If you are actually finished with a lesson, you will get an answer.