Learning Goal #5
Students will be able to construct complex web pages and understand the purpose of every HTML element, attribute, and value that was written into their code.
PART 1: Deadlines
Read More
Below are your deadlines for Learning Goal #5: Mastering the Foundations of HTML. If you complete approximately 1.5 lessons per week, you should be able to keep up with the deadlines.
- January 11, 2019:
Getting Started – Lesson 5.0 - February 1, 2019:
5 Lessons Complete (5.1 through 5.5) - February 4, 2019:
Quarter Quiz #1 (Questions from 5.1 through 5.5 Only) - March 1, 2019:
6 Lessons Complete (5.6 through 5.11) - March 4, 2019:
Quarter Quiz #2 (Questions from 5.1 through 5.11) - March 4 to March 13, 2019:
Learning Goal Project (Grading on March 13)
REMINDER: In order to earn an A for each lesson, you need to complete each assignment within the lessons. At the end of each lesson, you will take a short quiz on eCampus and confirm that you have done all the assignments. If you only do some of the assignments, you can still do okay, but it is in your best interest to complete them all. Your grade depends on how much you get done within the time you are given.
PART 2: Overview
Read More
Everything on a web page is considered content (words, images, links, etc). HTML allows you to organize your content based on what are called block level and inline level elements. For example, when you write a paragraph using the p element, everything in that element falls down to the next line because it wants to be on its own block. So we call the p element a block level element. On the other hand, inline level elements (such as em, strong, sup) will stay in whatever line they were used. HTML5 expands on this idea and allows us to think of page content in many ways. This lesson is about understanding those different methods of content management.
Below are some helpful tips and resources that you can use during and after this lesson is over.
Common Models
- Document Object Model (DOM): The DOM looks a lot like a family tree and helps to lay out the content of an HTML document so that each individual element makes more sense.
- Parent Elements: An element that surrounds another element is called a parent element. For example, the body tag is a parent element to all the tags inside of it.
- Child Elements: An element inside of another element is called a child element. For example, if there is a paragraph (the p tag) and inside of that paragraph is a span tag, the span element is a child of the p element.
- Block Level Elements: If you add an element to your HTML document and it starts on its own new line, that’s a block level element. For example, every p tag starts on a new line. Others are div and h1-h6.
- Inline Level Elements: If you add an element to your HTML document and it stays in the same line as the previous element, that’s called an inline element. For example, a span tag does not start a new line. Others are img and a.
PART 3: Assignments
Read More
Assignment #1 (1 Point): SoloLearn Lessons
Log into your SoloLearn account and find the Course called HTML Fundamentals. Inside of this course, watch the following lessons (you will need your headphones), but when you finish, be sure to make note of how many SoloLearn points you have earned. Points are based on how many slides/videos you complete and how many questions you answer correctly after each slide segment.
- Introduction to HTML5
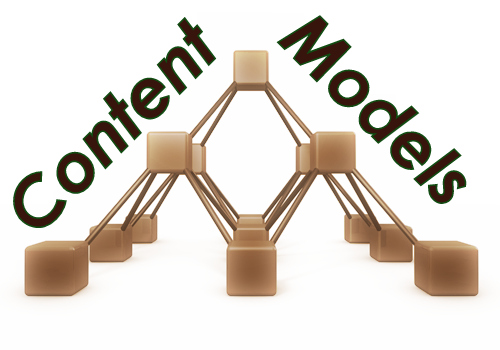
- Content Models
- HTML5 Page Structure

Assignment #2 (1 Point): Design Project – Structure
This is the first part of your design project. Open a new Notepad document and save it as “5-7_pinkfairyarm.html” in your WD2 folder. Type this code into your Notepad and when you finish, make sure that it looks like this. Do not move onto Assignment #3 until the page sections look right.

Assignment #3 (1 Point): Design Project – Content
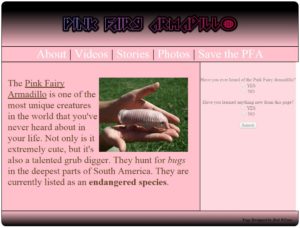
Now that you have the structure ready to go, you should notice that the body of your document has 6 block level elements (div, header, nav, article, aside, and footer). Your job now is to fill in those blocks based on the information below. You are about to create a web page about the Pink Fairy Armadillo (yes, it’s a real creature… Google it).
- Inside the header element – Add a logo for the Pink Fairy Armadillo (Cool Text is acceptable).
- Inside the nav element – Add five links to helpful resources about the Pink Fairy Armadillo (Do some research)
- Inside the article element – Write a simple paragraph about the Pink Fairy Armadillo based on information you’ve discovered in your research. Use 3 inline level elements to style specific words within your paragraph. Once you have a paragraph, add one picture of the Pink Fairy Armadillo (still inside the article element).
- Inside the aside element – Using the form element, create a two-question survey about the Pink Fairy Armadillo. You might want to use radio or checkbox buttons.
- Inside the footer element – Write a simple copyright statement like “Page Designed by Josh Caldwell, 2015.” Be sure to use a block level element (p, h1, h4, etc) for the copyright statement and at least one inline level element (span, em, strong, sub, etc) for something you want to emphasize, such as your name or the year.
When you are finished, your page might look something like this.
Assignment #4 (1 Point): Update Your Index
Similar to the last lesson, take the time to add your new design to your index page using a screenshot and a link.
Assignment #5 (1 Point): Review and Quiz
Look over the 5.7 Review Sheet. Read over the vocabulary terms. Look over the questions. Make sure you know how to answer each question. Then go to eCampus, find the quiz for Lesson 5.7, and take it. This is a way for you to show the teacher that you have finished this lesson.
If you have finished the assignments in this lesson, you will need a new password so that you can enter Lesson 5.8. Feel free to ask the teacher and don’t be afraid to raise your hand or go up to ask. If you are actually finished with a lesson, you will get an answer.