 Learning Goal #5
Students will be able to draw a variety of lines and two-dimensional shapes with JavaScript and Canvas.
PART 1: THE SET UP
Read More STEP 1:
Go into your “LG6_canvasjs” folder and create a new subfolder called “lesson6”. This is where you will keep all of your files for this lesson.
STEP 2:
Open Notepad++ and close any file that you might still have saved.
STEP 3:
Create three new documents with Notepad++ called lesson6.html, style6.css, and animations.js. All of these documents will be saved to your new “lesson6” folder.
STEP 4:
Copy this HTML code and paste it into your “lesson6.html” file.
STEP 5:
Copy this CSS code and paste it into your “style6.css” file.
STEP 6:
Copy this JavaScript code and paste it into your “animations.js” file.
STEP 7:
After pasting all three codes into all three files, click the SAVE ALL button at the top of Notepad++.
STEP 8:
Open your HTML file with Chrome and make sure you see the canvas.
STEP 9:
Create a split screen between your Notepad++ and your browser display.
PART 2: DAILY DESIGN
Read MoreCHALLENGE #1 (Advanced):
Canvas Shape Animation
Remember those days when we used to write out codes together? That’s what we’re going to do in a few minutes. But in the meantime, while you wait for others to get set up, your challenge is to see if you can create a function that moves the box from one side of the canvas to the other on its own. Chances are, you won’t have enough information to put a successful function together on the first try, but once everyone is completely set up, we’ll build an animation function together.
 CHALLENGE #2 (Intermediate):
Animation Clearing
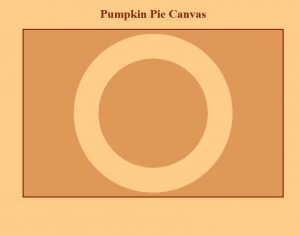
Erase the code in your animations.js and replace it with this code snippet. You will see a rotating square in the middle of your canvas. The speed is controlled on Line 4 and the number is counted in milliseconds when applied to Line 17, which means that higher numbers go slow while lower numbers go fast. The angle is controlled on Line 5 and the number is counted in decimal degrees while applied to Line 15. However, your challenge is to make the square repeat on its own so that you eventually see a circle like this.
CHALLENGE #3 (Intermediate):
fillRect vs strokeRect
Erase the code in your animations.js and replace it with this code snippet. You will see one filled rectangle and three outlined rectangles. Similar to the last challenge, you are being asked to find the one thing you need to change so that the shapes repeat and give you a complete circle like this.
CHALLENGE #4 (Advanced):
Back to Shapes, Lines, & Loops
Erase everything in your animations.js except for Lines 1-2. The teacher will be challenging you to create squares, lines, and loops. We will practice this together several times until everyone feels at least a little bit comfortable. Remember, if you can’t create something simple, then the rest of the code will probably keep looking like a foreign language.
CHALLENGE #5 (Beginner):
Making Connections
Erase the code in your animations.js and replace it with this code snippet. Your challenge is not to change anything, but to make connections between various lines in the code. For example, Line 1 explains Line 2, Line 4 explains Line 5, and so on. Your job is only to work with your partner and figure out where each line is connected.
CHALLENGE #6 (Beginner):
Animation Exploration, Part 1
Erase the code in your animations.js and replace it with this code snippet. This is less of a challenge and more of an exploration. Take the approximately four minutes to explore this code line by line so that you can see what does what. Avoid just changing a bunch of numbers. Change one thing at a time and then put your own comment above that line explaining what you think it does. We will take a tour of other students’ work at the end.
CHALLENGE #7 (Intermediate):
Animation Exploration, Part 2
Erase the code in your animations.js and replace it with this code snippet. This is less of a challenge and more of an exploration. Take the rest of the period to explore this code line by line so that you can see what does what. Avoid just changing a bunch of numbers. Change one thing at a time and then put your own comment above that line explaining what you think it does. We will take a tour of other students’ work at the end.